The bottom bracket is the component that connects the crankset to the bicycle and allows the crankset to revolve freely and experiences more torque than any part of the bike (letting it wear out very quickly). It contains a spindle to which the crankset is attached and the bearings that allow the spindle and cranks to rotate. The bottom bracket fits inside the bottom bracket shell. There are 3 common types of bottom brackets:

- Sealed Cartridge: Normally two pieces, a unit holding the spindle and bearings that screws into the bottom bracket shell from the drive side and a support cup that supports the spindle/bearing assembly on the non-drive side. Other designs are three-piece. Servicing the BB is a simple matter of removing the old cartridge and installing a new one.
 Cup-and-cone: Contains four major pieces: lockring, adjustable cup, spindle and fixed cup. The non-drive side lockring has notched rings and the adjustable cup may have holes for a pin spanner, or notches for a wrench. The drive side (fixed cup) will have wrench flats, but no lockring. This type of BB can be adjusted and should be serviced regularly.
 One piece/"Ashtabula": Found on older Schwinns, juvenile bikes, some BMX bikes and on many department store-style bikes. It is composed of one piece of steel and though they are heavy, they are very reliable and the easiest to service. You can completely overhaul this type with just a large adjustable wrench and screwdriver.
When to service/adjust your BB:
- If the BB is loose:
- Test by grabbing both cranks and pushing and pulling laterally (not towards front and rear)
- Test by grabbing both cranks and pushing and pulling laterally (not towards front and rear)
- If the ball bearings are worn out:
- Test by first taking the chain off the chainring and spinning the cranks while holding the frame with one hand. If you feel a rumbling/grinding, the bearings or cartridge should be replaced. Ball bearings wear out last, so replacement of the internal parts (cups, spindle) will most likely be necessary.
- If the crankset has play:
- i.e., rocking and creaking, then your BB is most likely loose and needs tightening
- To remove the cranks:
1. Crank puller
2. 8mm allen key or 14mm socket wrench
3. (depends on crank puller) 16 mm open end wrench and large adjustable wrench - To overhaul the bottom bracket:
1. Bottom bracket wrench OR a pin spanner
 2. Hooked lock ring wrench
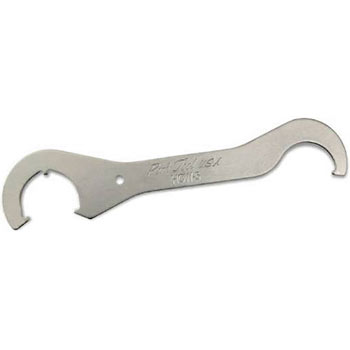 3. 36-mm wrench
- To re-grease the bearings:
1. Cleaning solvent 2. Waterproof Grease
 3. Rag
4. Toothbrush
- Remove the cranks
- Loosen and remove the lock ring on the non-drive side by turning counter clockwise
- Loose and un-thread the non-drive side bearing race using either a pin spanner or BB wrench
- Pull the spindle and both bearing cages out of the frame. It is important to remember which way the spindle came out, as they are directional. The drive side usually has a longer distance from the bearing race to the end of the threads.
- Wipe off the bearing cages and drop them in solvent
- Use the rag to clean both the spindle and outer bearing races
- Tighten the drive-side bearing race by turning counter-clockwise with your 36mm wrench. No need to remove it.
- Inspect both bearing races and spindle for pitting and wear. Most wear occurs on the spindle's bearing races. If there is pitting, replace it.
- Clean both bearing cages with a toothbrush and solvent, and then set them aside to air-dry.
- Apply a layer of grease on both bearing races and cages.
- Place the bearing cages in both races. The rounded side of the cage should be facing down into the bearing race.
- Insert the spindle from the non-drive side and wipe off any excess grease that comes out.
- Grease the threads inside the BB shell
- Slide the outer race and bearing cage onto the spindle and thread it on all the way clockwise, but don't tighten it
- Wipe off excess grease.
- Thread on the lock ring finger tight
- Install the drive-side crank and tighten it. This will help to make a proper adjustment.
- Hold the inner race firmly with your wrench and tighten the lock ring.
- When properly adjusted, the spindle should spin smoothly. If it doesn't, loosen the lock ring, back off the inner race a little bit and then tighten again.
- Check for play by placing the crank arm close to the frame and pushing/pulling it against the frame. There should be no movement. If it feels loose, loosen the lock ring and tighten the inner race.
- When the adjustment is correct, install the left crank.
- Splined bottom bracket tool

- 32 mm headset wrench or a large adjustable wrench
- Grease
- Remove both cranks
- Remove the non-drive side first, using the splined BB tool and the wrench by turning counter-clockwise
- Remove the drive side by turning clockwise
How to install a cartridge bottom bracket
- Clean and grease the threads on the BB and inside the frame
- Thread the new lock ring part way into the non-drive side of the frame by turning it clockwise. Do not tighten.
- Thread the cartridge all the way into the drive side of the frame by turning counter-clockwise.
- Tighten it with about 25-30 foot-pounds of pressure using a torque-wrench
- Finish tightening the left side clockwise until it's nice and snug
BicycleTutor - How to Overhaul a Bottom Bracket
How to Replace a Cartridge Bottom Bracket
Cartridge Bearing Type Bottom Bracket Service
No comments:
Post a Comment